In today’s digital age, efficient typing skills are more crucial than ever. Whether you’re a student, professional, or casual computer user, mastering touch typing can significantly boost your productivity and reduce fatigue. One of the fundamental aspects of touch typing is proper finger placement. This article will guide you through the correct positioning of your fingers on a standard QWERTY keyboard.
The Home Row: Your Typing Foundation
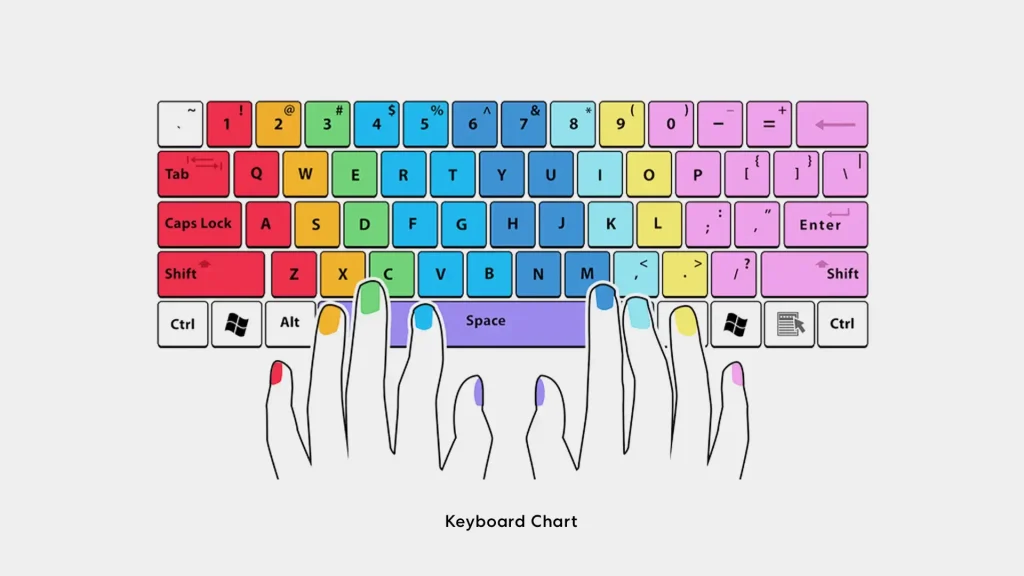
The “home row” is the starting point for all finger movements in touch typing. It’s called the home row because it’s where your fingers should “rest” or “home” when not reaching for other keys.
- Left hand (from pinky to index): A, S, D, F
- Right hand (from index to pinky): J, K, L, ;
Your thumbs should rest lightly on the spacebar.
Finger Assignments
Each finger is responsible for specific keys:
- Left Pinky: Q, A, Z, and left Shift
- Left Ring: W, S, X
- Left Middle: E, D, C
- Left Index: R, F, V, T, G, B
- Right Index: Y, H, N, U, J, M
- Right Middle: I, K, ,
- Right Ring: O, L, .
- Right Pinky: P, ;, /, right Shift, Enter
Visual Guide
Here’s a visual representation of the finger placement: